This how-to guide will take you through the process of programming the Phillips SpeechMike III with Dragon® Medical Practice Edition in 4 simple steps. The SpeechMike III allows you to automate various features of Dragon Medical Practice Edition, supercharging your productivity and efficiency. Whether you’re navigating though a template, opening applications, inserting text or invoking hotkeys, the Philips SpeechMike III gives you the power to get more done in less time. Illustrated screen shots are featured below for your convenience.
STEP 1: Connect your Philips SpeechMike III
Connect your Philips SpeechMike III to any open USB port on your computer. We recommend using the USB port on the back of your PC if possible as there is typically more power allocated to them.
STEP 2: Download & Install the Philips Device Control Center
Successor of the Device Configuration Tool, the Philips Device Control Center is used to tailor the behavior of the SpeechMike III, and Foot Control device for a range of applications. Once the PDCC is installed, the default profile is configured for Dragon Medical Practice Edition, streamlining the process for new users to begin using the device. Your buttons will have become pre-programmed to operate the basic functionality of the unit.
NOTE: Some documentation will refer to the Philips Device Control Center as Speech Control. These applications are one in the same.
1. Click Here to download the Philips Device Control Center. As of November 1, 2011 Version 2.8 Build 260 is the latest. This download may take up to 20 minutes depending on your Internet speed.
2. Once the download has completed, go to where it was saved and extract (unzip) the folder to display its contents. Double-click the PhilipsDeviceControlCenterSetup to begin the installation.

3. A Philips Device Control Center Install Shield Wizard will appear. This wizard will take you through the installation process step by step. Select [Next] to begin.

4. Following the prompts in the wizard to complete the installation will take only a few more clicks of the next button.
You may minimize the Device control Center for now and return to it in Step 4.
STEP 3: Create a profile in Dragon Medical Practice Edition
In this step we create your user profile in Dragon Medical Practice Edition using the Philips SpeechMike III as the dictation source. For this guide, we will assume that you have not yet created a user profile before and are starting fresh. If you have already been using Dragon Medical software with a different dictation source, we recommend that you add an additional dictation source to your existing profile, selecting the USB input option. Otherwise you may follow these steps.
1. Open Dragon Medical Practice Edition, if this is your first time opening Dragon Medical Practice Edition, a Profile Creation wizard will appear.
Note: If the profile creation wizard does not automatically appear, go to Profile > Open User Profile and select [New]
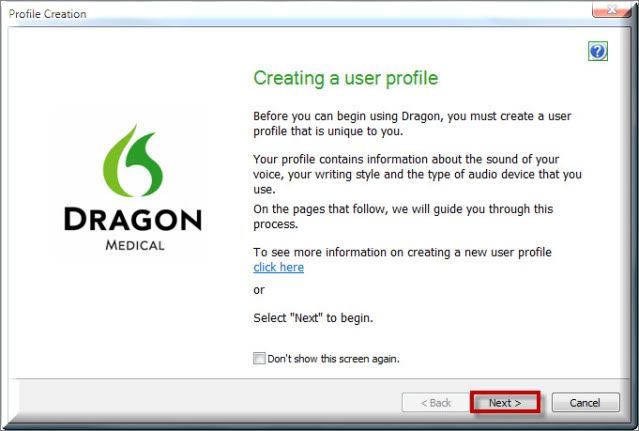
2. Select [Next] to begin the profile creation process. The wizard will ask your name, age, region, vocabulary, and accent. Choose the option in the lists that best fit you.
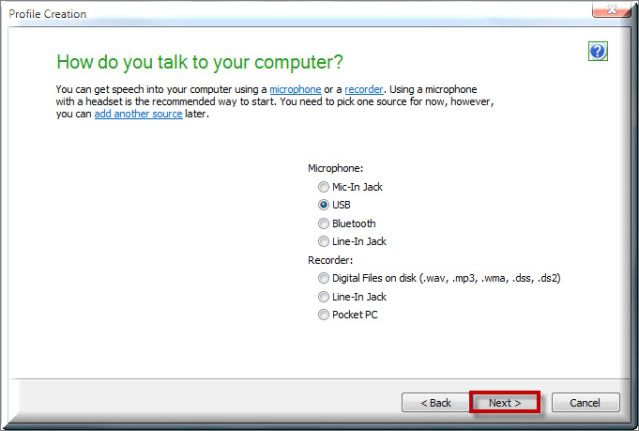
3. You will come to a screen that will ask ‘How do you talk to your computer?’, choose [USB] under the Microphone category then [Next] to continue.
4. Your selections will now be displayed. Please review to ensure that you have selected the best options that will fit your needs and select [Create]. Dragon Medical Practice Edition will begin to create your profile based on the options selected.
5. You will then be prompted to ‘Check your Microphone’, select [Next] to adjust your audio settings.
6. Select [Start Volume Check] to begin the process. When doing so, the text in the box above will illuminate. Read the text in that box until you hear a beep.

7. Once you’ve hard the beep, you will advance to the next window. Select [Start Quality Check] and read the text in the box until you hear a second beep. Select [Next] to advance to the training options.
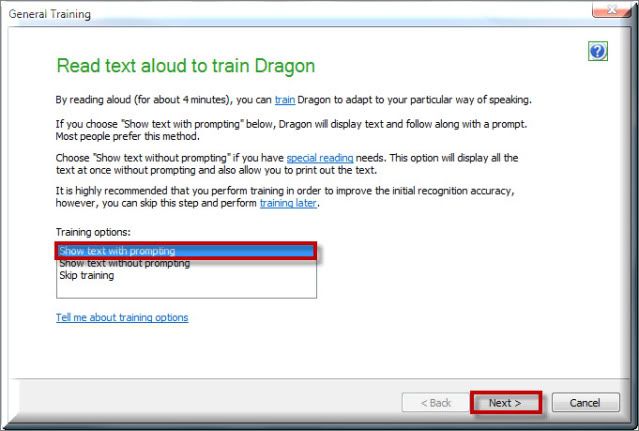
8. The system will now prompt you to begin training. Select [Show text with prompting], select a story and read the story in to the Philips SpeechMike III until training has completed. This process will take approximately 8-10 minutes.
Once you have completed the training process your profile will be created and you will now be able to dictate into Dragon Medical Practice Edition using your Philips SpeechMike III. As mentioned in Step 2, your SpeechMike III is now preprogrammed to control the basic functionality of Dragon Medical Practice Edition, such as controlling the microphone and playback. Proceed to Step 4 if you wish to customize the SpeechMike III to meet your individual needs.
STEP 4: Customizing the Philips SpeechMike III
As we mentioned above, the microphone is now programmed to work with Dragon Medical Practice Edition. You will always have the choice to change the default configuration to meet your specific needs. Follow the instructions below to do so:
1. Open the Philips Device Control Center aka Speech Control Application, and select the [Application Control] tab.

There are three columns in the Application Control Tab:
Name – This is the button on the SpeechMike III that can be programmed.
Pressed – This column represents the action that will take place once the button is pressed.
Released – This column represents the action that will take place once the button is released.
2. If you wish to change the default settings, select the ellipsis box […] next to the desired action (i.e. Pressed or Released)
3. Once the ellipsis box is selected, an Edit Operation window will open.

4. In order to make a change to the default settings or to add new settings, use the [Add], [Edit] and [Delete] buttons.
5. The edit and delete options are self-explanatory. If you select [Add], an Operation Step Editor dialog window will appear with 6 options.

Hotkey – This option will allow you to program a hotkey or a combination of hotkeys to the button selected.
Text – This option will allow you to insert a block of text when the button is selected.
Start Application – This option will allow you to automatically open a particular application on your computer when the button is engaged.
Mouse Button – This option will allow you to use a mouse command when the button is engaged.
Dragon NaturallySpeaking Command – This option will invoke a built-in Dragon command when the button is selected.
Delay – This option will tell the system to wait for a specific period of time when the button is selected.
6. Make your selection, again select [Next] to return to the edit operation screen.
7. Select [Apply] to transfer your new settings to the SpeechMike III.

8. Close the Philips Device Control Center and you are good to go!
Note: The PDCC must be running in the background and set to active in order for the device to recognize the commands. Confirm that it is running in your System Tray.
Verification Source: In-House Testing